| BMW Garage | BMW Meets | Register | Search | Today's Posts | Mark Forums Read |
|
|
|
 SUPPORT ZPOST BY DOING YOUR TIRERACK SHOPPING FROM THIS BANNER, THANKS! |
|||||||||
Post Reply |
|
|
Thread Tools | Search this Thread |
| 08-01-2007, 05:19 PM | #1 |
|
Private First Class
 109
Rep 129
Posts |
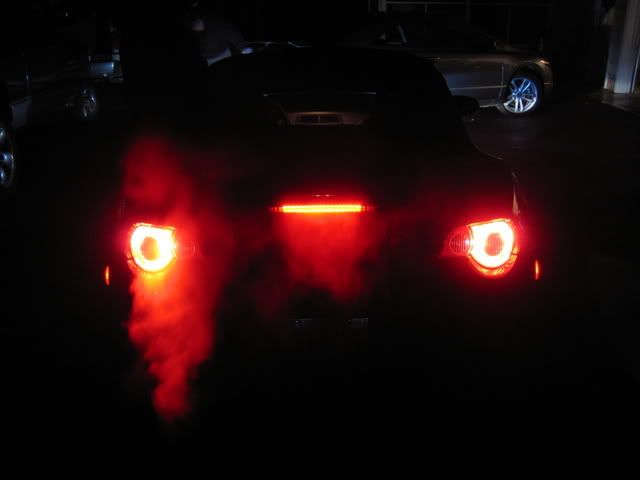
DIY Request: Full Taillight Lights Up When Braking ('03-'05 Models)
Sorry, I've been wanting to do this mod for a while but I just realized that z4um.com has closed, along with the DIY post for this mod.
I've looked around other bimmer forums for this mod but I've had no luck. I would appreciate any help! Thanks  |
| 08-01-2007, 07:49 PM | #2 |
|
Private
 6
Rep 80
Posts |
It's easy to figure out.
Take the light out and figure which wires connect to both tail lights. Find the bulb that lights up when you brake and bridge that wire to the other bulb, leave the existing wire in there otherwise the bulb fail light will come on. This is based on what I know of the lights...if anyone thinks this is the wrong way let me know 
__________________
|
|
Appreciate
0
|
| 08-01-2007, 08:54 PM | #3 |
|
Private First Class
109
Rep 129
Posts |
I've looked into it, but figuring out the wires is a hassle and I don't want to cut anything up (e.g., exposing any wires).
The old DIY on z4um.com said the guy used some Radio Shack part and he knew which two wires to join together. I already bought the Radio Shack part from a while ago, but I need to know which wires. If anybody knows, has the instructions, has done this mod, or has that z4um.com page cached, PLEASE HELP! Much appreciated. -Mike |
|
Appreciate
0
|
| 08-02-2007, 02:13 AM | #4 |
|
Private
6
Rep 80
Posts |
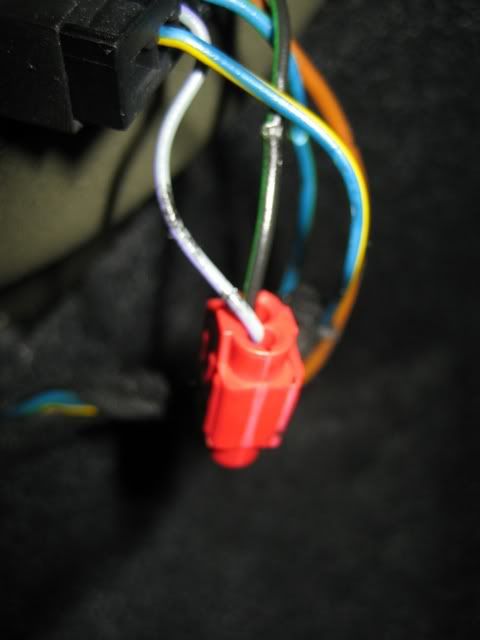
It's pretty simple to work out, there a 5 pins on the light, these are all in an open circuit layout meaning you can tell which pin/wire does what just by looking at it, there will be one pin which connects to all lights making your earth and the other 4 will go to each light individually making the positive.
Just work out which pins lead to the two main brake light bulb and bridge them. The light has to come out anyway just to make life easier, it's a bit fiddly to work with in place.
__________________
|
|
Appreciate
0
|
| 02-27-2008, 12:14 PM | #6 |
|
Private First Class

4
Rep 112
Posts |
Has anyone else done this? Is this mod consdiered safe in the long term, would the radio shack connector overheat?
I know I'm bringing up some old threads, but it just goes to show I use search! |
|
Appreciate
0
|
| 02-29-2008, 01:31 PM | #7 |
|
gone baby gone
382
Rep 1,052
Posts |
Done correctly, this is totally safe. The radio shack part is just a bridge. It does not overheat. It is providing no resistance or doing anything mechanical. It can even be skipped if you just cut and join / solder the two wires together.
I should really do this mod myself, I've been meaning to but haven't yet. |
|
Appreciate
0
|
| 03-06-2008, 06:11 PM | #8 |
|
Second Lieutenant
 
20
Rep 259
Posts |
Easy.... BUT
I just did this and it was simple enough and all the brake lights come on. BUT now I have yellow light on the instrument cluster that means "defective bulb"... All the bulbs are good... Before I remove the jumpers to see if it goes way, I was wondering if anyone else ran in to this... Thanks Chuck
|
|
Appreciate
0
|
| 03-06-2008, 07:29 PM | #9 |
|
Second Lieutenant
20
Rep 259
Posts |
The Idiot is in my garage tonight!
I found the problem... when I put the bridge on the right rear light, I cut one of the wires.. The light was working, but the circuit going back was open.. so it looked like the bulb was out... Anyway, fixed now and looks great...
Chuck |
|
Appreciate
0
|
| 03-10-2008, 09:05 PM | #13 |
|
Registered
0
Rep 4
Posts
Drives: 2008 Titanium Silver Z4 3.0i
Join Date: Dec 2007
Location: Az.
|
I saw this post and liked the idea. I did mine a little different though... Instead of just bridging the circuits I installed a nitrous delay controller I had laying around and used it to control relays to bridge the connections. This gives me the option of delaying the illumination of the inner half of the lamp once the outer half comes on. I have it set at a delay of one second right now. It is adjustable from one tenth of a second up to 20 seconds or so. I used the input from the third stop lamp to activate the controller so as not to alter the circuit voltage on either lamp which might bring on the lamp out warning light. I've been using it for four months now without any issues at all.
 The controller is quite small (2"x2"x.5") so it and the relays fit nicely under the trunk liner below the right lamp access panel.
__________________
It's not the destination that matters...It's the journey that makes the road worth traveling.
|
|
Appreciate
0
|
Post Reply |
| Bookmarks |
| Thread Tools | Search this Thread |
|
|