

|
|
|
|
 |

|
 |
BMW Garage | BMW Meets | Register | Search | Today's Posts | Mark Forums Read |
 |

|
BMW 3-Series (E90 E92) Forum
>
Official E90 Clear Bra DIY - Part nos and Video Concept
|
 |
| 01-29-2007, 11:35 AM | #1 |
|
//Mdicted

346
Rep 9,988
Posts
Drives: a Cop Magnet
Join Date: Sep 2005
Location: 495 Ring
iTrader: (18)
Garage List 2009 e92 M3 DCT CF ... [10.00]
2015 S-Works Roubaix [0.00] 2013 Trek Madone 5.9 [9.50] 2012 Scott - CR1-Pro [10.00] 2008 e92 M3 6MT (Up ... [10.00] 2002 e46 M3 Cabriol ... [7.00] 2006 e90-325i (DD) [7.00] 2002 e39 M5 (retired) [9.50] |
Official E90 Clear Bra DIY - Part nos and Video Concept
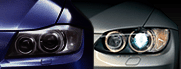
I was curious on how difficult it would be to install a Clear Bra before, until I run into this online video from Xpel now the mystery is gone. The video is a DIY that explains how the clear bra for the hood, bumper, mirrors & headlights gets done. Im sure this video makes it easier than it looks, but atleast to me its never anymore a mystery. Like most things, with enough time and patience it can be done.
Im surprised no one has posted this video yet, when others made mention Xpel as a product on other threads . The Clear Bra DIY video shows a e46, like anything else just use the concept presented since different cars have different contures and shapes. Here's Xpel DIY Video Hood & Fender Clear Bra DIY Video Mirror Clear Bra DIY Video Bumper Clear Bra DIY Video Head & Foglights Clear Lens DIY Video
__________________
Last edited by ase2dais; 02-08-2007 at 05:18 PM.. |
| 01-29-2007, 11:36 AM | #2 |
|
//Mdicted
346
Rep 9,988
Posts
Drives: a Cop Magnet
Join Date: Sep 2005
Location: 495 Ring
iTrader: (18)
Garage List 2009 e92 M3 DCT CF ... [10.00]
2015 S-Works Roubaix [0.00] 2013 Trek Madone 5.9 [9.50] 2012 Scott - CR1-Pro [10.00] 2008 e92 M3 6MT (Up ... [10.00] 2002 e46 M3 Cabriol ... [7.00] 2006 e90-325i (DD) [7.00] 2002 e39 M5 (retired) [9.50] |
I'll be listing the e90/92 clear bra part nos. next
Page 40 of 3 Series Original BMW Accesories book second edition E. Clear Protective Covering Virtually invisible covering protects your BMW's brilliant color while helping to gurad against abrasions. Will not harm paint, yellow, fade, crack or peel 3 series sedan and Sports Wagon Hood and Mirror Coverings pn 82 11 0 339 148 Price $154.95 Bumper Covering pn 82 11 0 399 149 Price $234.95 Foglight Covering pn 82 11 0 399 150 Price $19.95 3 Series Coupe Hood and Mirror Coverings pn 82 11 0 421 570 Price $179.95 Bumper Covering pn 82 11 0 421 571 Price $234.95 Foglight Covering pn 82 11 0 241 572 Price $19.95
__________________
Last edited by ase2dais; 01-30-2007 at 08:57 PM.. |
|
Appreciate
0
|
| 01-29-2007, 11:45 AM | #3 | |
|
//Mdicted
346
Rep 9,988
Posts
Drives: a Cop Magnet
Join Date: Sep 2005
Location: 495 Ring
iTrader: (18)
Garage List 2009 e92 M3 DCT CF ... [10.00]
2015 S-Works Roubaix [0.00] 2013 Trek Madone 5.9 [9.50] 2012 Scott - CR1-Pro [10.00] 2008 e92 M3 6MT (Up ... [10.00] 2002 e46 M3 Cabriol ... [7.00] 2006 e90-325i (DD) [7.00] 2002 e39 M5 (retired) [9.50] |
Heres Andrew 330 Quote from the other thread that may be also useful in terms
of materials needed or are used http://www.e90post.com/forums/showpo...54&postcount=7 Quote:
THIS DIY IS POSTED FOR INFORMATIONAL PURPOSES ONLY, PLS BE ADVICE YOU ASSUME ALL RISK FOR MISTAKES AND ADDITIONAL COST MADE. PLS REFER TO OTHER MBRS VENDOR OR DEALERSHIP MATERIALS FOR GUIDANCE
__________________
Last edited by ase2dais; 06-05-2008 at 07:43 PM.. |
|
|
Appreciate
0
|
| 01-29-2007, 12:12 PM | #4 |
|
Administrator
40672
Rep 21,237
Posts |
Thanks for sharing Al. Adding to DIY Master List.
__________________
Check on the Latest BMW News
Become a fan of Bimmerpost Facebook Follow us on Bimmerpost Twitter Subscribe to Bimmerpost Youtube Channel |
|
Appreciate
0
|
| 01-15-2008, 04:01 PM | #6 |
|
born to be turbocharged

24
Rep 1,347
Posts |
__________________
Disclaimer: All this message was written with recycled electrons.
|
|
Appreciate
0
|
 |
| Bookmarks |
| Thread Tools | Search this Thread |
|
|


