3D Design Side Skirt DIY
Before we begin, I should disclose that all 3D Design kits include paper install instructions courtesy of 3D Design Japan. Also, the last thing IND or 3D Design wants is for the client to damage the piece while attempting a DIY install. As a result, if anyone feels uncomfortable with the install, please seek the help of your local body shop. With these disclosures out of the way, let’s get down to business.
Installing the side skirt set requires additional clearance on the underside of the vehicle. Regardless of your technique for increasing clearance, hydraulic lift or jack with jack stands, please be sure to follow proper operational instructions.
Tools required:- Phillips screwdriver or drill bit
- An extra set of hands
Step 1:
Thoroughly clean the rocker panel. Yes, we skipped this step due to the -25 degree Fahrenheit wind-chill outside. If you are subject to the same weather, we recommend using no rinse for this step.
Step 2:
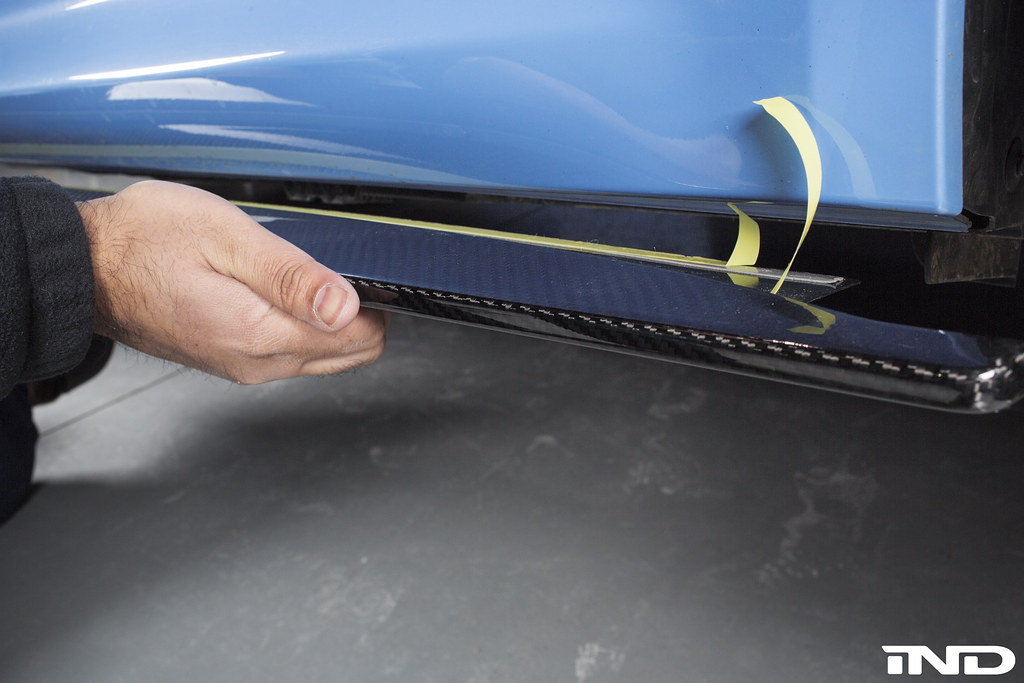
3D Design provides double-sided tape with all side skirt sets. The tape is not pre-installed, so you or your technician will have to take care of this step. The side skirt set requires two tape lines. The first tape line is on the flat mounting flange. The second tape line is on the vertical surface next to the flat mounting flange. You want to position this tape line a couple millimeters below the top edge. The first photo in the series is a close-up of these tape lines. The provided instructions will also have a guide for applying the double sided tape.
Step 3:
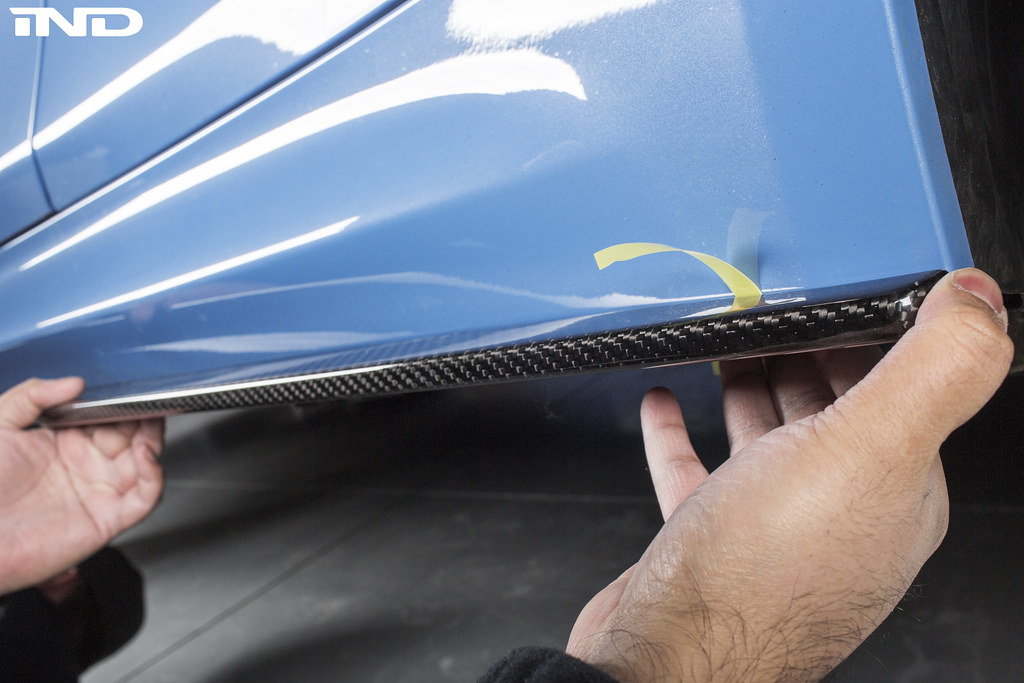
With the tape applied to the side skirt. Fold the edges of the tape, so that you can access/pull once the side skirt is bolted to the vehicle. Fold the bottom tape line toward the center of the car and the outside tape line away from the vehicle.
Step 4:
Now it is time to take advantage of the extra set of hands. The mounting flange on the 3D Design side skirt is the length of the factory rocker panel. Have your helper position the side skirt with the back edge of the rocker panel.
Step 5:
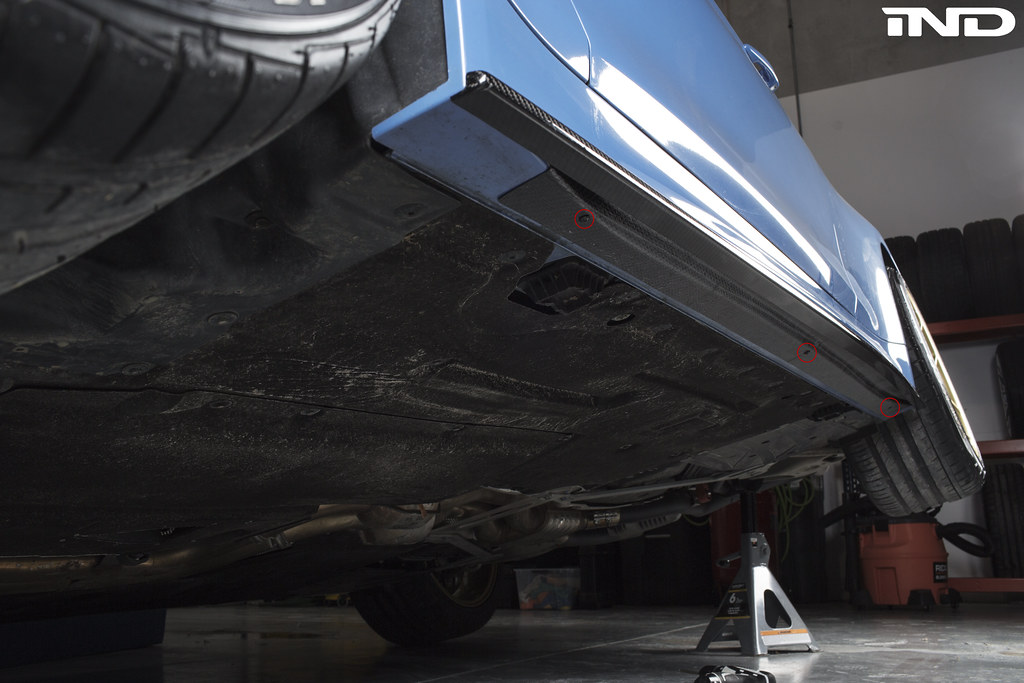
While your helper is holding the side skirt to the rocker panel, install the 3 self-tapping screws. Circled in red. As with the front lip, we like to tighten the screws, but not all the way. Keeping a little slack in the screws will ensure that we can remove the cover for the double-sided tape.
Step 6:
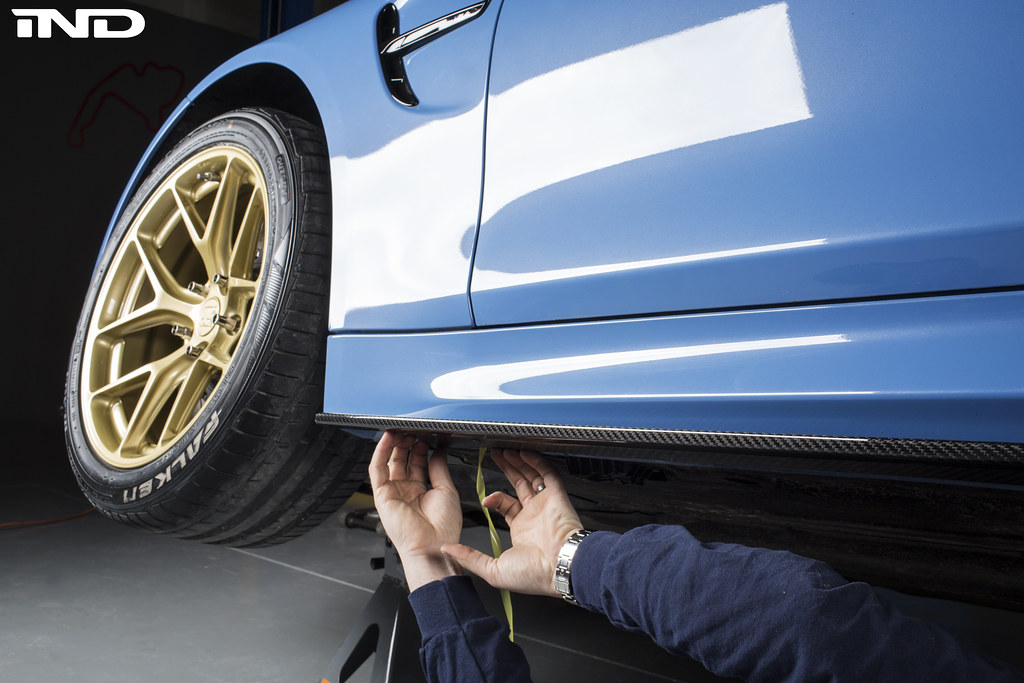
Pull the folds of the double-sided tape.
Step 7:
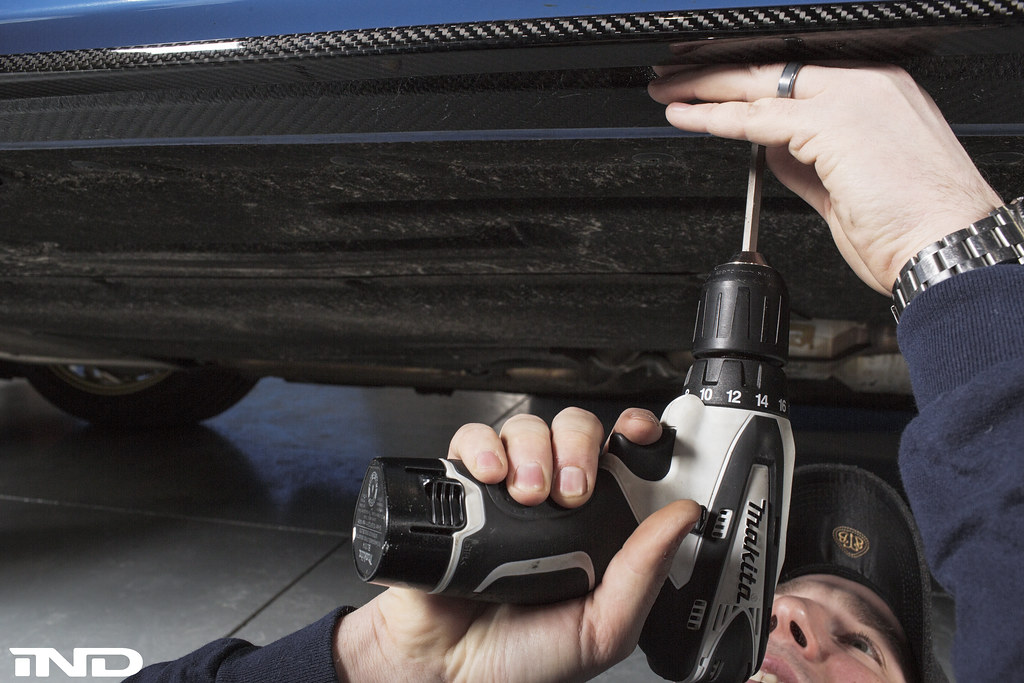
Tighten the 3 self-tapping screws down.
Step 8:
Apply gentle pressure across the bottom and side of the side skirt.
ENJOY